Installing CUDA and cuDNN on Ubuntu 20.04
CUDA is the runtime library for GPU‑accelerated deep learning, while cuDNN provides optimized primitives that speed up training. Both are required for a typical machine learning stack: tensorflow‑gpu (or PyTorch) + CUDA + cuDNN. The cuDNN version must be compatible with the installed CUDA toolkit.
- Preliminary Checks
Verify the GPU and driver status:
nvidia-smi
+-----------------------------------------------------------------------------+
| NVIDIA-SMI 510.108.03   Driver Version: 510.108.03   CUDA Version: 11.6     |
|-------------------------------+----------------------+----------------------+
| GPU  Name        Persistence-M| Bus-Id        Disp.A | Volatile Uncorr. ECC |
| Fan  Temp  Perf  Pwr:Usage/Cap|         Memory-Usage | GPU-Util  Compute M. |
|                               |                      |               MIG M. |
|===============================+======================+======================|
|   0  NVIDIA GeForce ...  Off  | 00000000:01:00.0 Off |                  N/A |
| N/A   42C    P8    N/A /  N/A |      9MiB /  2048MiB |      0%      Default |
|                               |                      |                  N/A |
+-------------------------------+----------------------+----------------------+

+-----------------------------------------------------------------------------+
| Processes:                                                                  |
|  GPU   GI   CI        PID   Type   Process name                  GPU Memory |
|        ID   ID                                                   Usage      |
|=============================================================================|
|    0   N/A  N/A       980      G   /usr/lib/xorg/Xorg                  4MiB |
|    0   N/A  N/A      1592      G   /usr/lib/xorg/Xorg                  4MiB |
+-----------------------------------------------------------------------------+
- If this output appears, the NVIDIA driver is already installed. Most Ubuntu installations include it by default ✔️
- If the driver is missing, Ubuntu provides an easy way to install it through Software & Updates → Additional Drivers. Choose the driver with the highest version number, apply, restart, and run
nvidia-smiagain to confirm.
The CUDA Version: 11.6 shown in the top‑right corner of nvidia-smi indicates the maximum CUDA version supported by the driver, not that CUDA is already installed.
This guide installs
CUDA 11.3andcuDNN 8.2.1
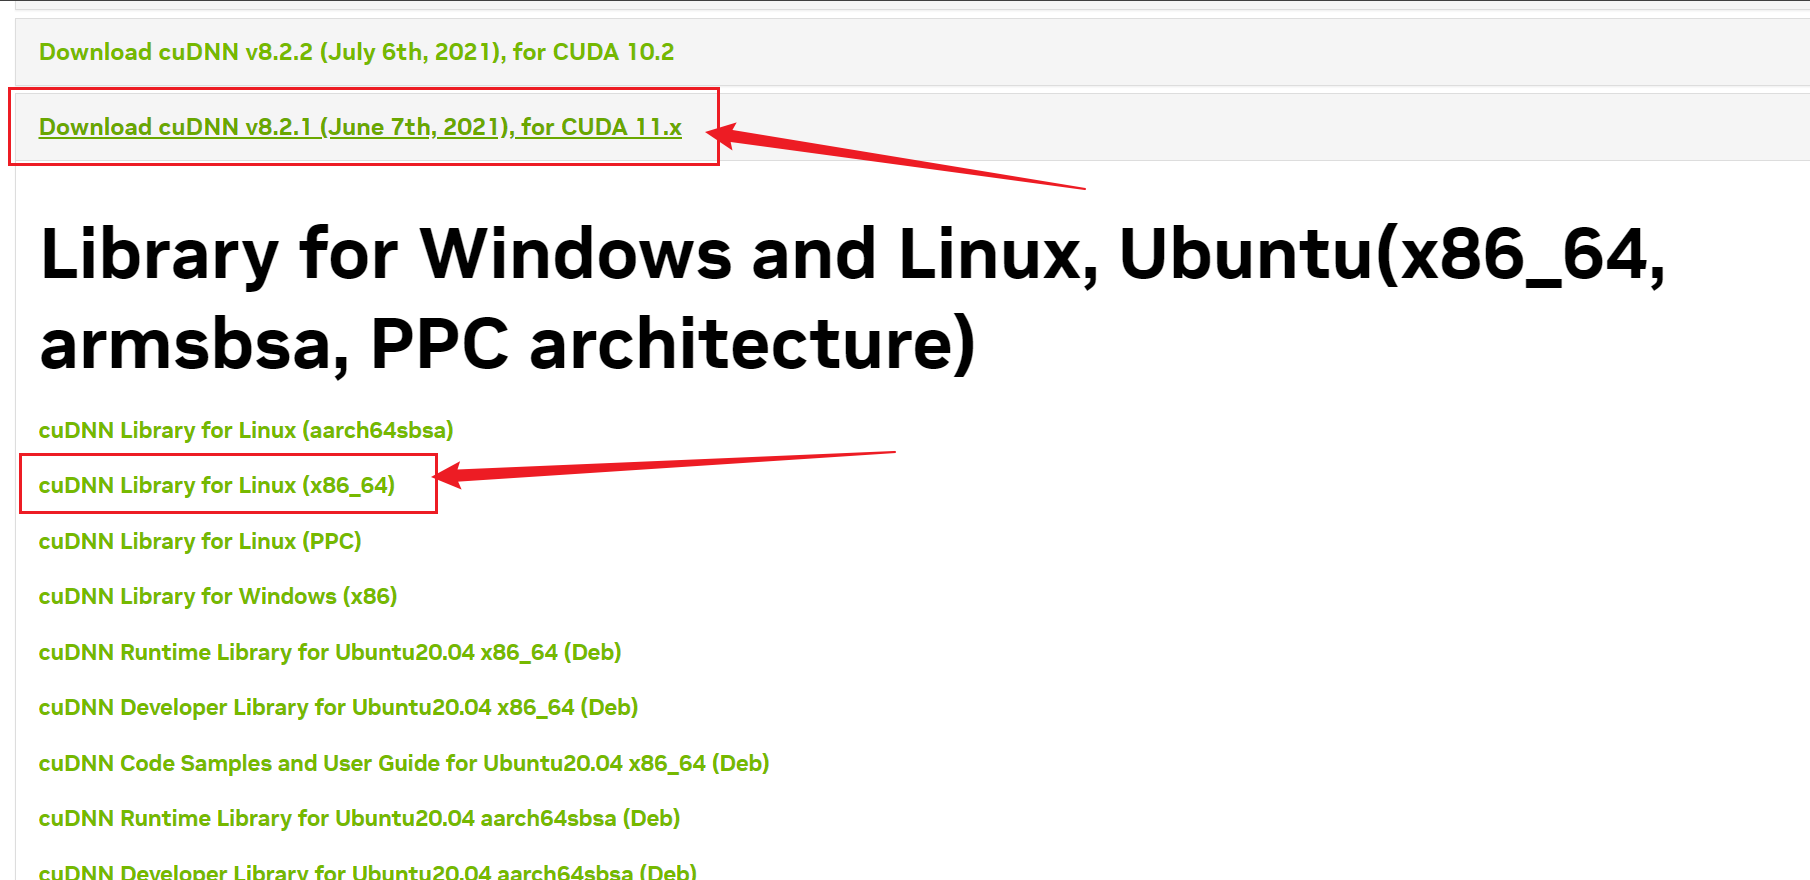
cuDNN version selection: check the official download page to see which releases support
CUDA 11.3.
- Installing CUDA
2.1 Downgrade g++
Ubuntu 20.04 ships with g++-9, wich is too new for some CUDA installer checks. A compatible version (7) must be set as default temporarily:
sudo apt-get install gcc-7 g++-7

sudo update-alternatives --install /usr/bin/gcc gcc /usr/bin/gcc-7 9
sudo update-alternatives --install /usr/bin/gcc gcc /usr/bin/gcc-9 1

sudo update-alternatives --display gcc

sudo update-alternatives --install /usr/bin/g++ g++ /usr/bin/g++-7 9
sudo update-alternatives --install /usr/bin/g++ g++ /usr/bin/g++-9 1

sudo update-alternatives --display g++
2.2 Download the CUDA Installer
CUDA Toolkit Archive: https://developer.nvidia.com/cuda-toolkit-archive
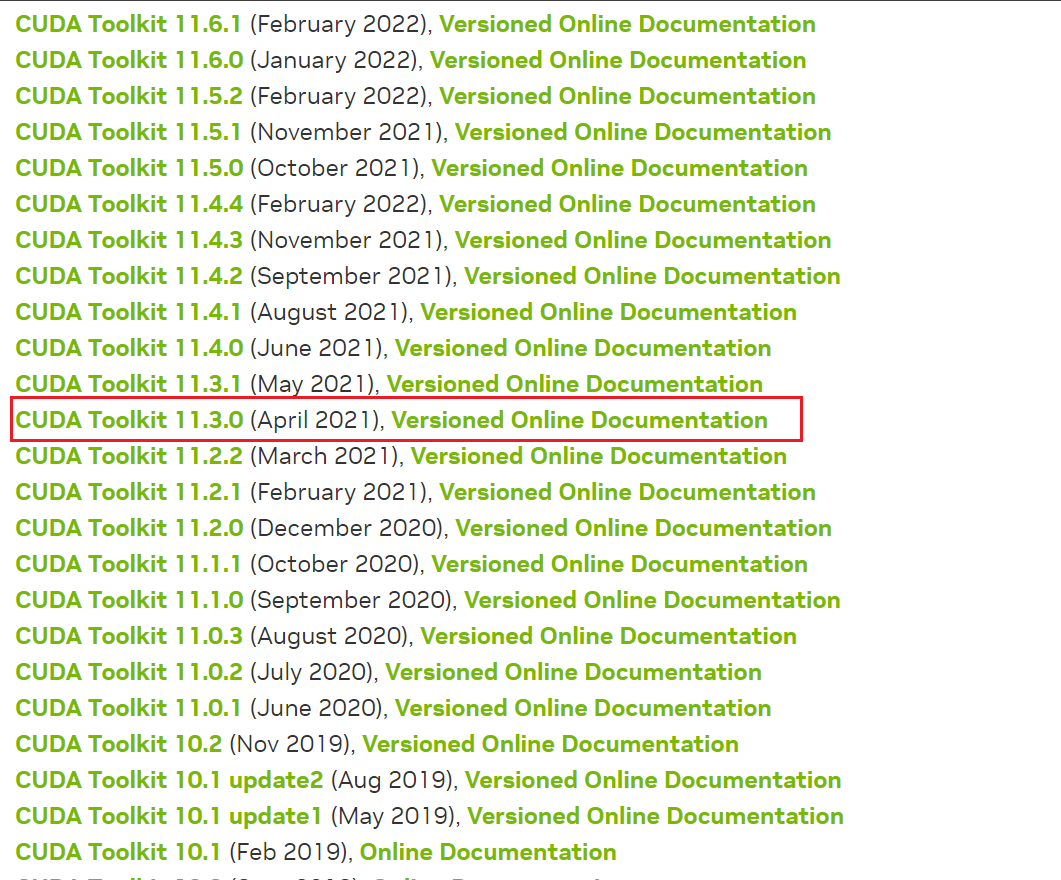
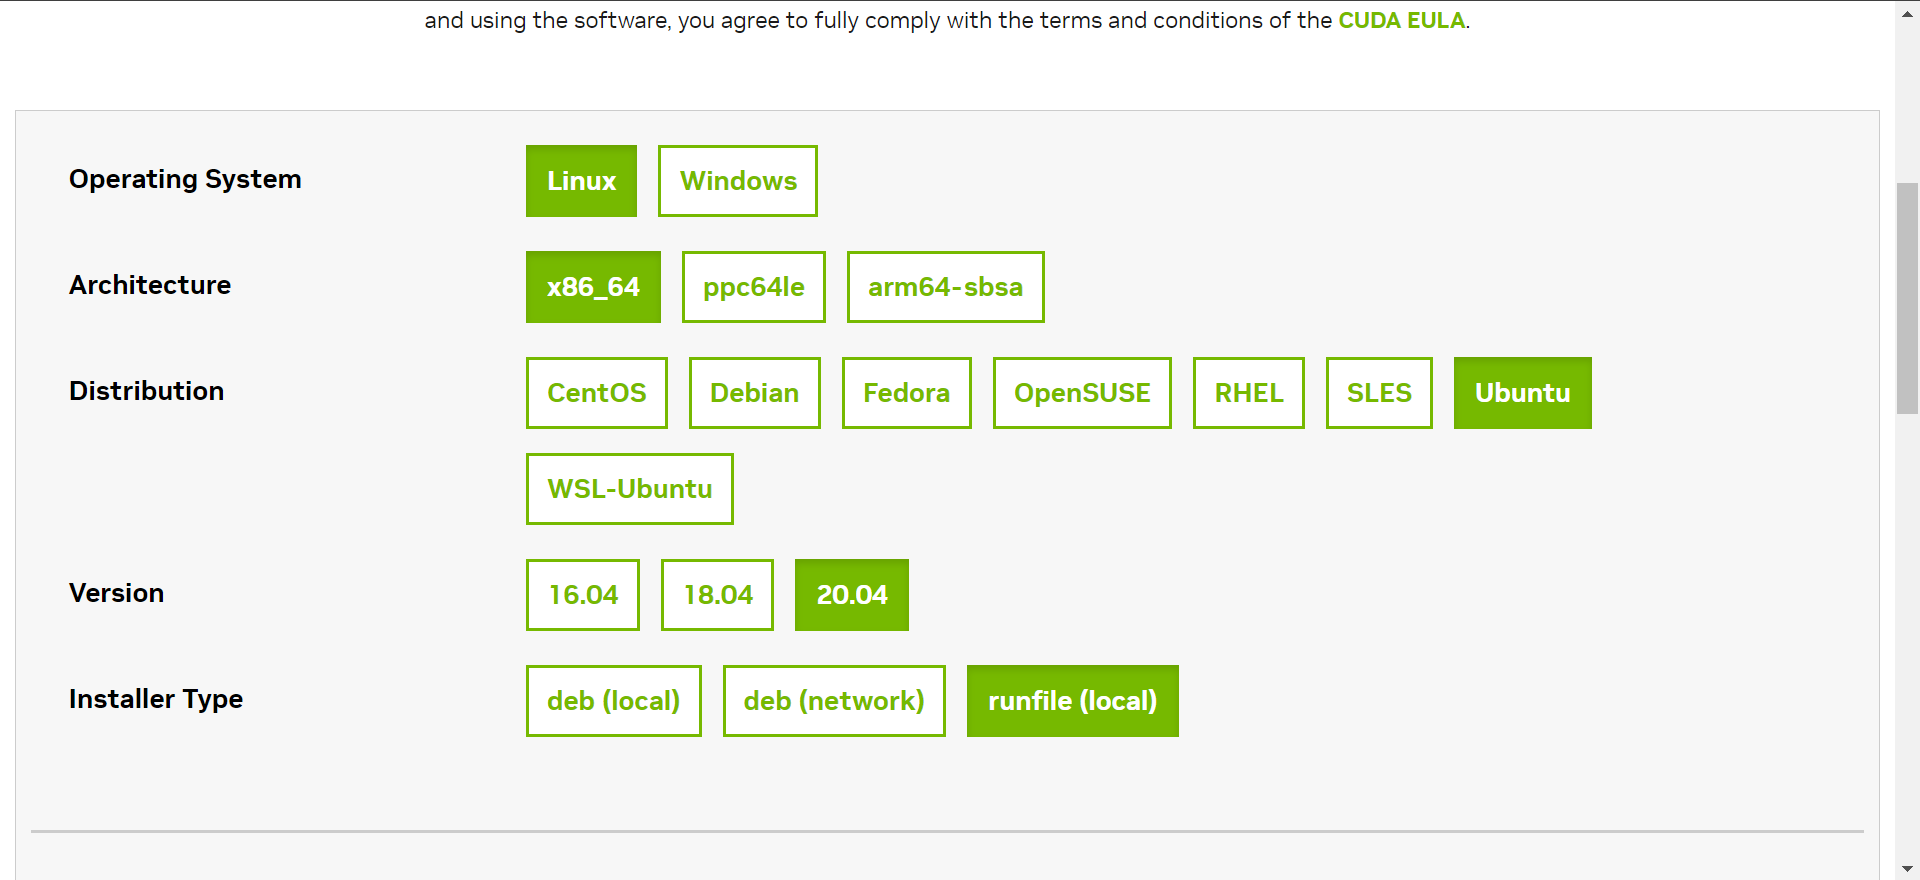
If a 20.04 installer is listed, use it; otherwise pick the closest match (usualy 18.04). The runfile enstallation method is recommended:
wget https://developer.download.nvidia.com/compute/cuda/11.3.0/local_installers/cuda_11.3.0_465.19.01_linux.run
sudo sh cuda_11.3.0_465.19.01_linux.run
wgetfetches the file;shexecutes the installer.
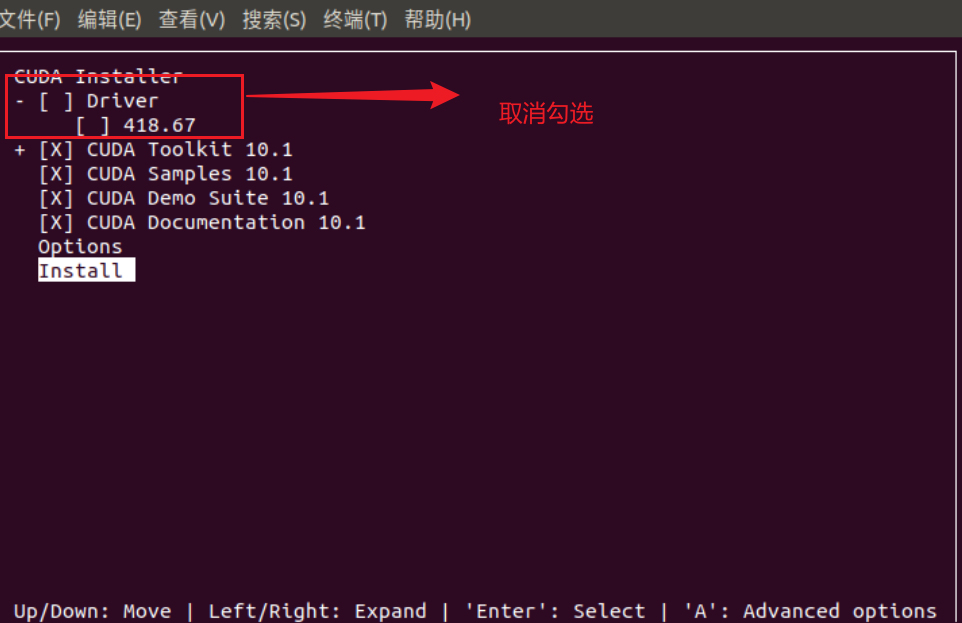
The following screenshots illustrate the installation prompts (key points highlighted):
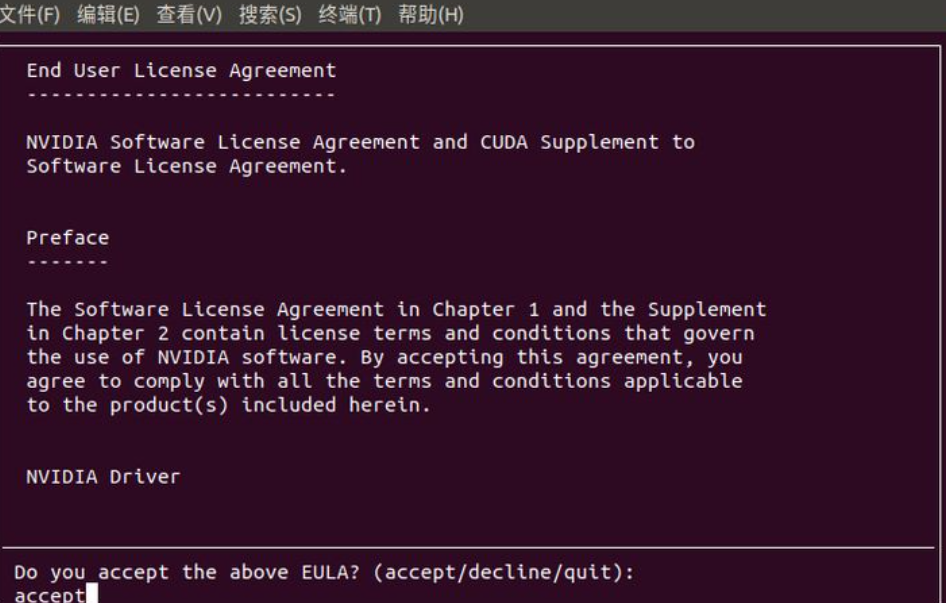
accept
Once the installer finishes, proceed to configure the environment.
2.3 Environment Variables ⚠️
This step is essential; otherwise programs will not be able to locate CUDA.
Edit .bashrc:
# using vim
sudo vim ~/.bashrc
# using a graphical editor
sudo gedit ~/.bashrc
Append the following lines (adjust the path according to the actual CUDA directory name under /usr/local):
export PATH=/usr/local/cuda-11.3/bin${PATH:+:${PATH}}
export LD_LIBRARY_PATH=/usr/local/cuda-11.3/lib64${LD_LIBRARY_PATH:+:${LD_LIBRARY_PATH}}
Reload the configuration:
source ~/.bashrc
Verify the installation by checking the version file:
cat /usr/local/cuda/version.json
And confirm the CUDA compiler version:
nvcc -V
- Installing cuDNN
The cuDNN setup is straightforward: download the matching package, copy the files, and adjust permissions. Registration is required on the NVIDIA Developer site to access the downloads.
cuDNN download page: https://developer.nvidia.com/cudnn
Copy the library and header files, then set read permissions:
sudo cp cuda/include/cudnn* /usr/local/cuda-11.3/include
sudo cp cuda/lib64/libcudnn* /usr/local/cuda-11.3/lib64
sudo chmod a+r /usr/local/cuda-11.3/include/cudnn*
sudo chmod a+r /usr/local/cuda-11.3/lib64/libcudnn*
Check the installed cuDNN version (the location differs between releases):
# older cuDNN versions
cat /usr/local/cuda/include/cudnn.h | grep CUDNN_MAJOR -A 2

# newer versions (8.x and above)
cat /usr/local/cuda/include/cudnn_version.h | grep CUDNN_MAJOR -A 2
