IntelliJ IDEA: Installation and First Program Guide
Introduction to IDEA
IDEA, short for IntelliJ IDEA, is an integrated development environment for Java. It is widely regarded in the industry as one of the best Java development tools available.
Key Advantages of IDEA
✅ Powerful Capabilities
① Strong integration with tools like Git, Maven, and Spring.
② Out-of-the-box experience: built-in version control systems and multi-language framework support are ready to use without additional plugins.
✅ Ergonomic Design
① Highly intelligent features: fast smart code completion, real-time code analysis, and reliable refactoring tools.
② Quick, convenient, and broad prompt functionality.
③ Useful keyboard shortcuts and code templates.
④ Precise search capabilities.
Uninstalling IDEA
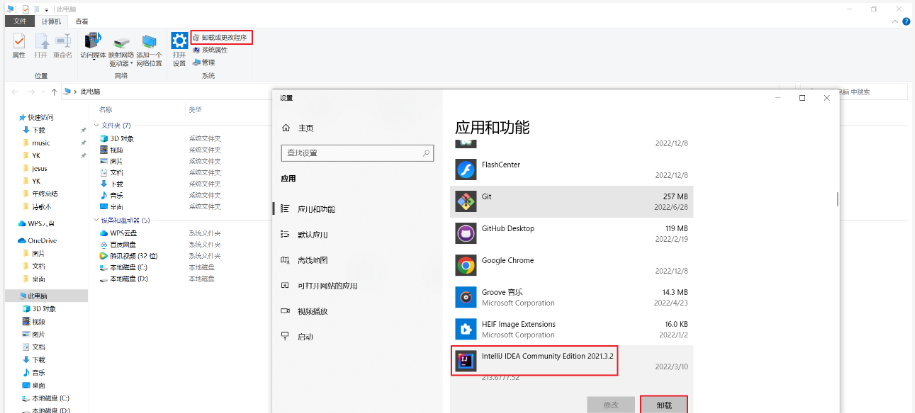
✅ The following steps use Windows 10 as an example. Navigate to "Add or remove programs" from "This PC," locate the IDEA installation, and uninstall it.
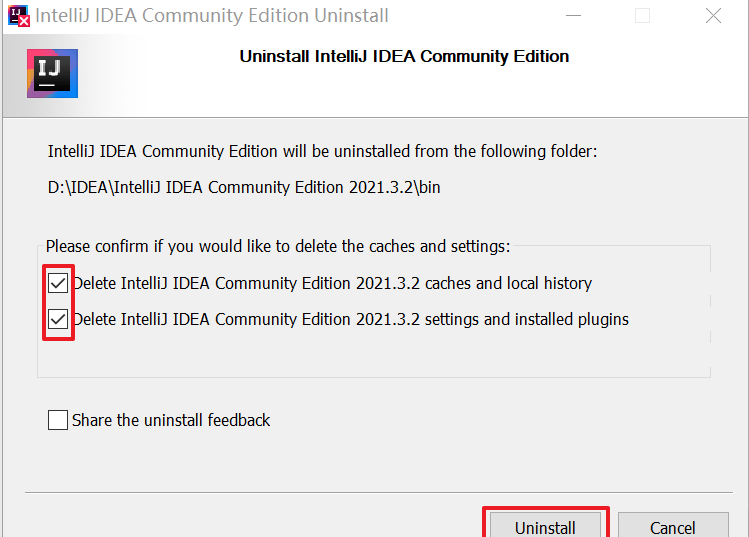
✅ Check both options shown below, then click "Uninstall" and wait for the process to complete.
Installing IDEA
IDEA download page: https://www.jetbrains.com//idea/download/#section=windows
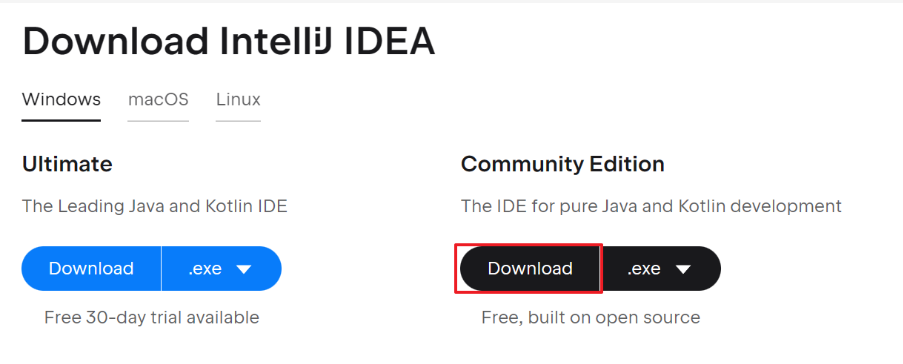
Two editions are available: Ultimate and Community.
Here, we will download the Community edition.
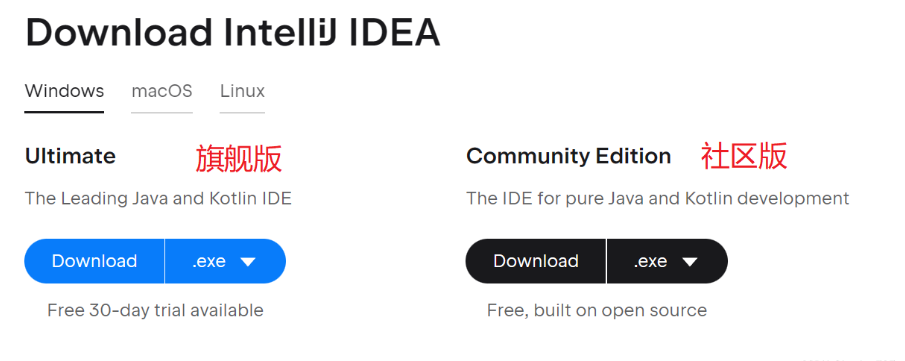
Choose the correct version for your operating system. For Windows, select the Community edition and click "Download."
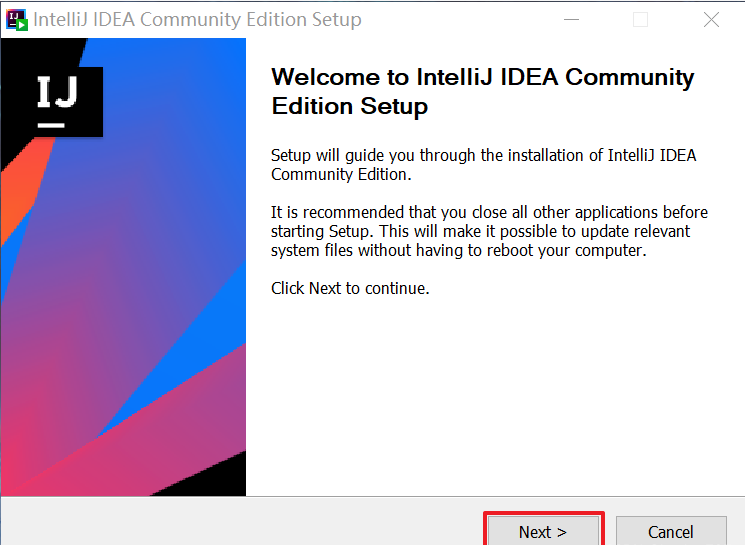
Locate the installer file and double-click it to start the installation.

✅ Click "Next."
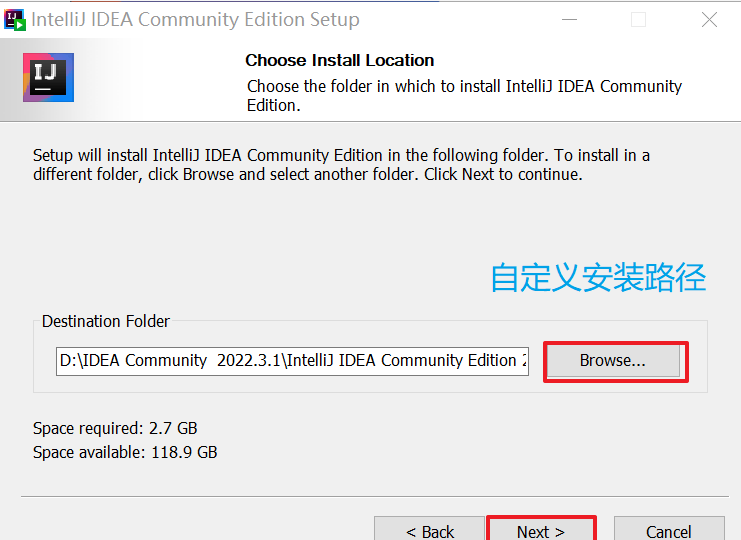
✅ Here, we choose a custom installation path (D:\IDEA Community 2022.3.1), but you can keep the default and click "Next."
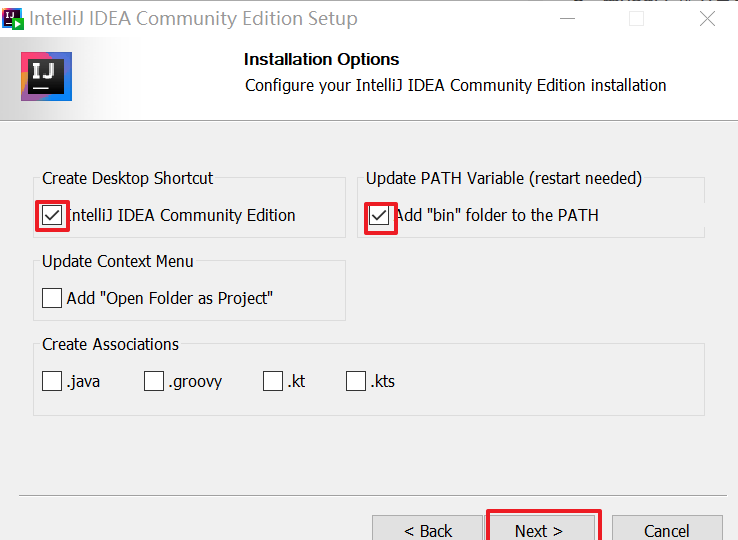
✅ Check both options shown, then click "Next."
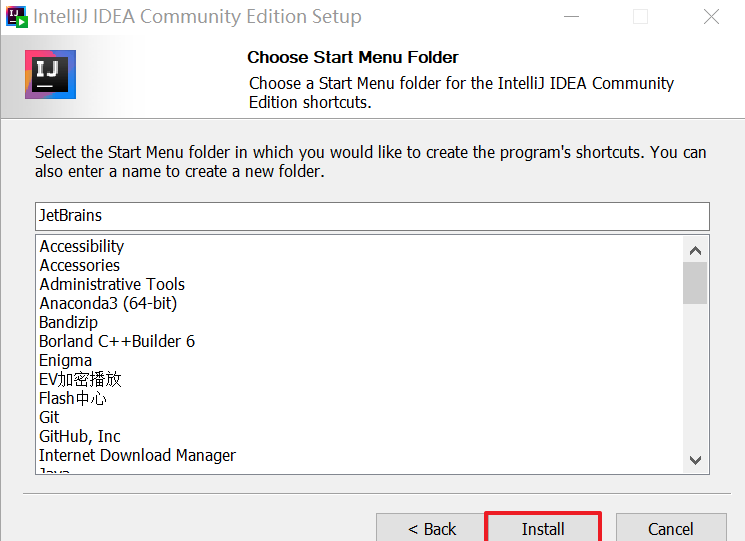
✅ Finally, click "Install" and wait for the process to complete.
First Program: Hello World
Steps to write a Java program:
- Create a Project.
- Create a Module.
- Create a Package.
- Create a Class.
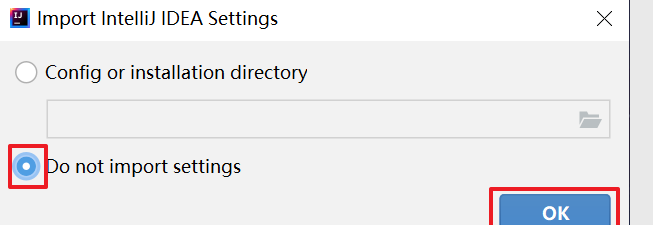
✅ Double-click to open IDEA. Check "Do not import settings" and click "OK."
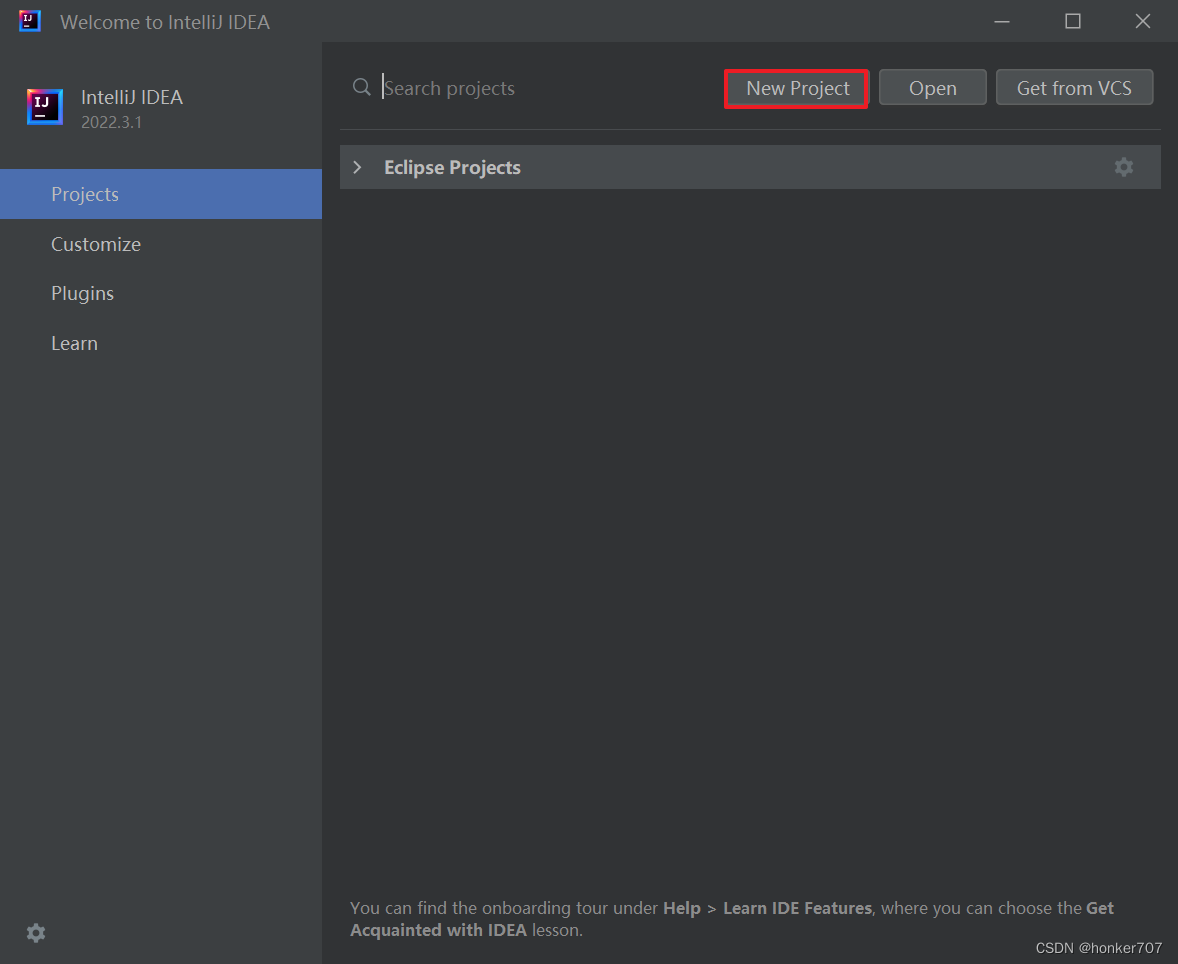
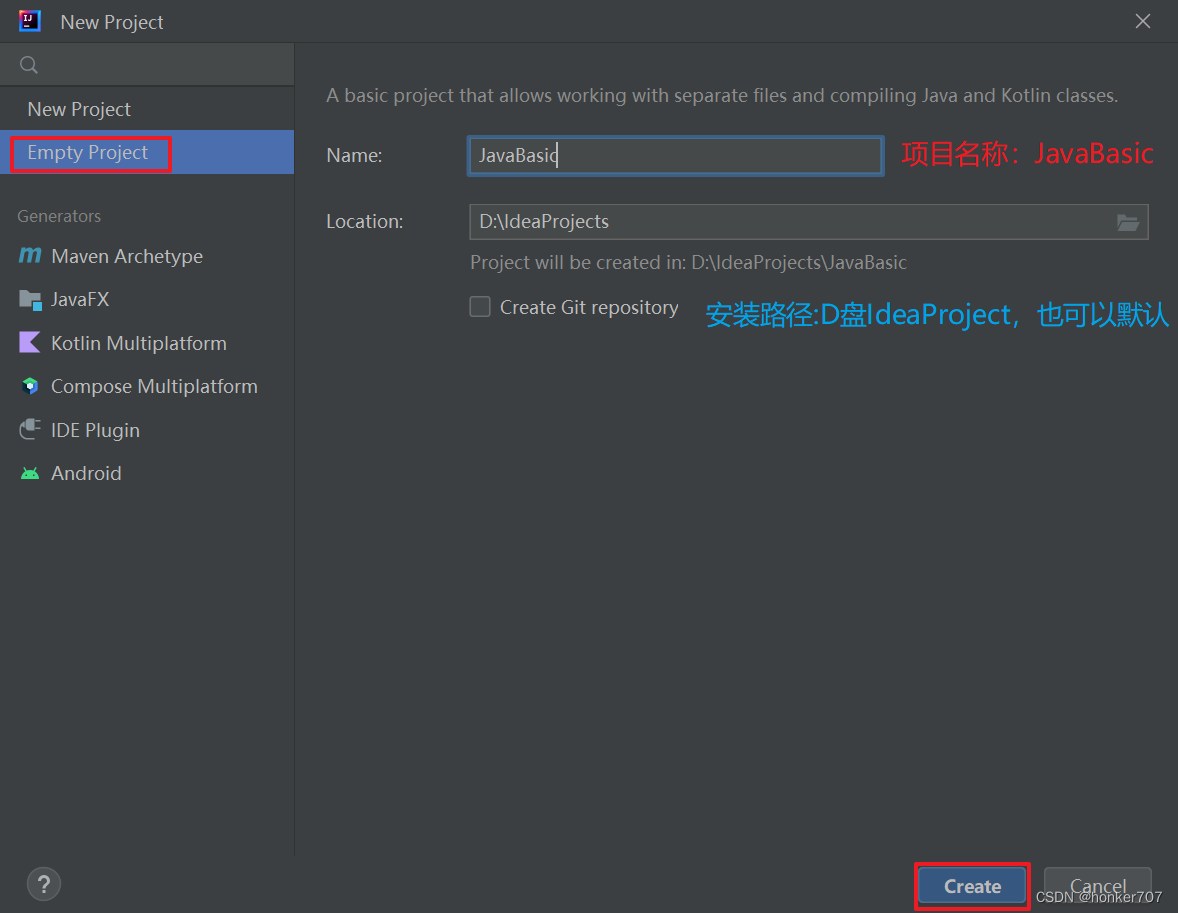
✅ Select "New Project," choose to create an empty project named "JavaBasic," and click "Create."
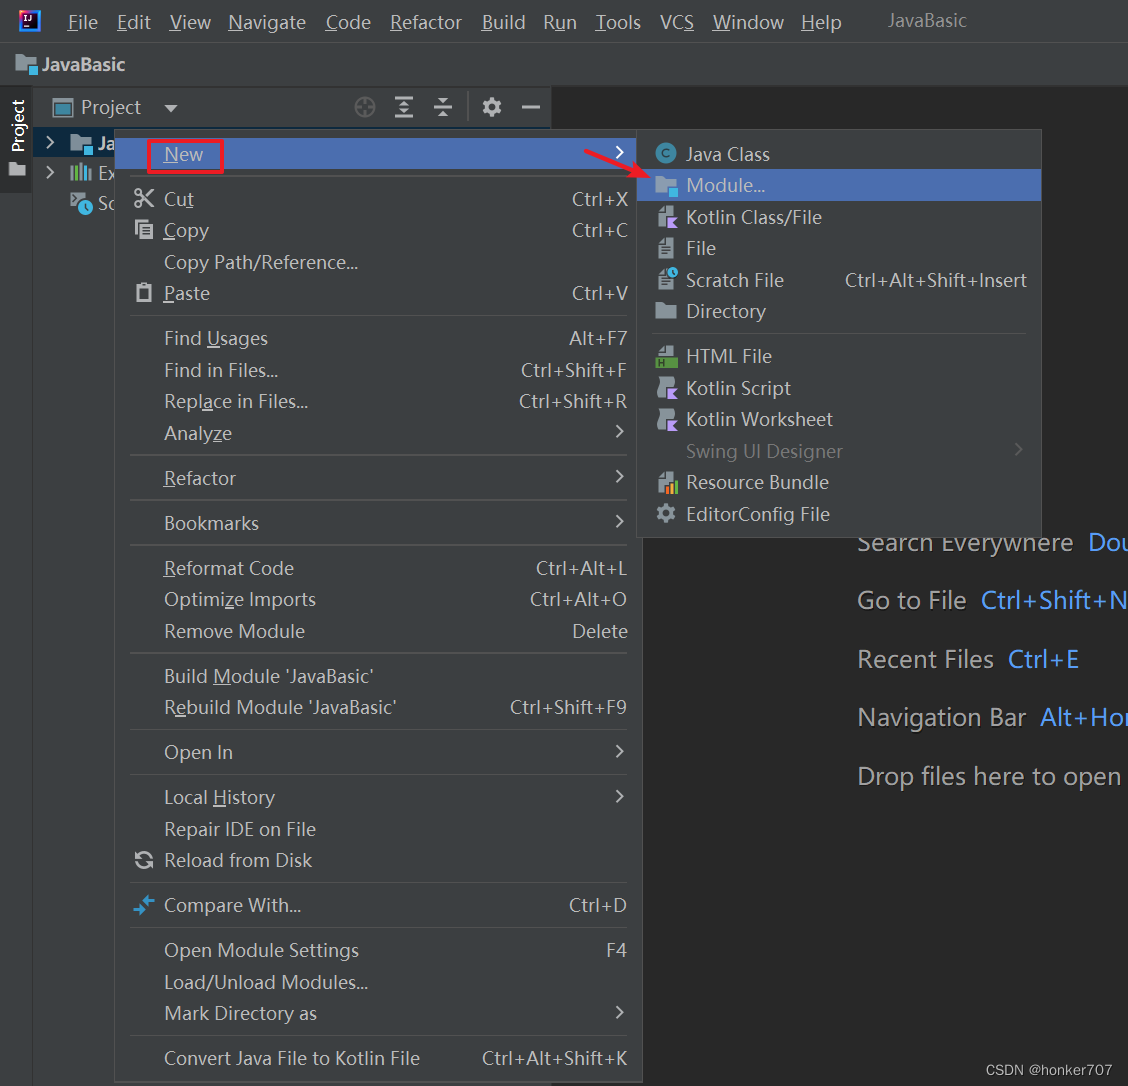
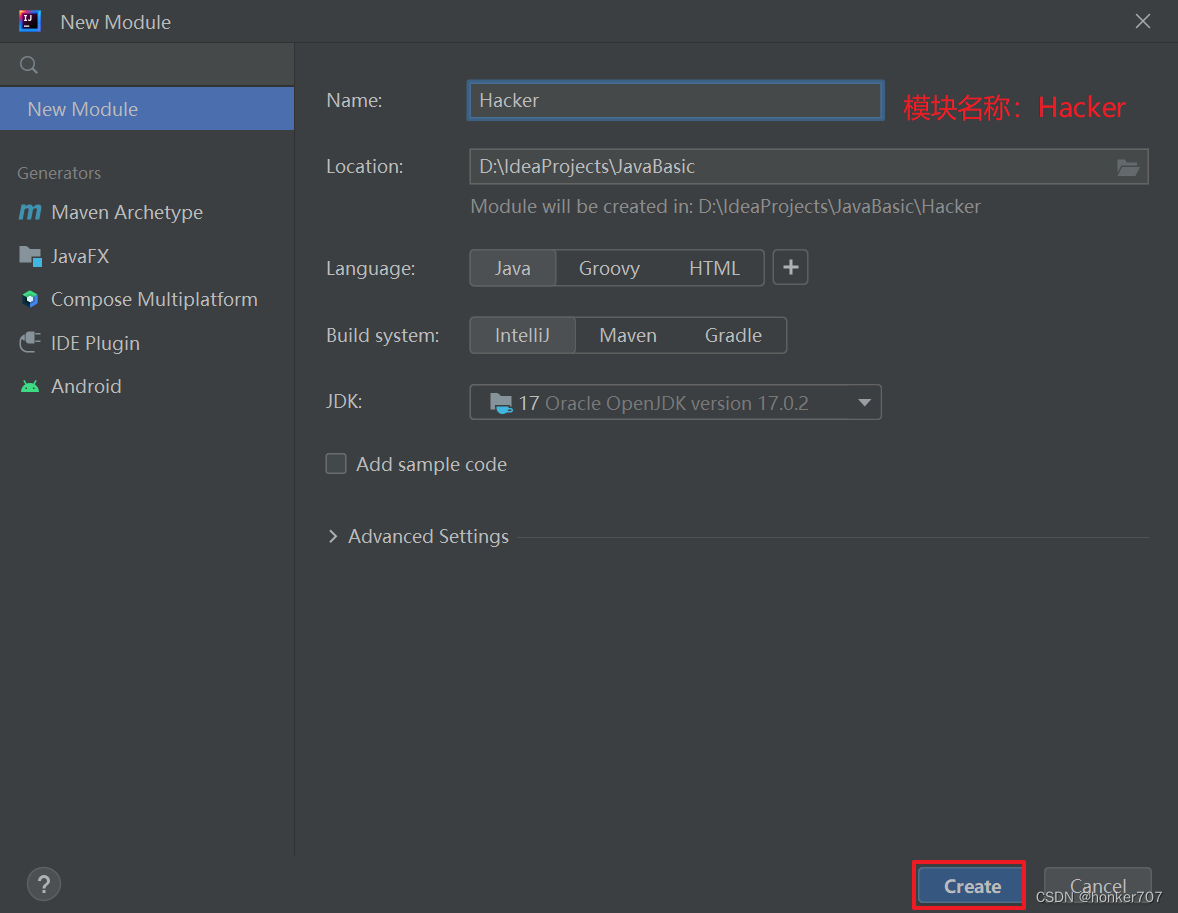
✅ Right-click the project and create a module named "MyApp."
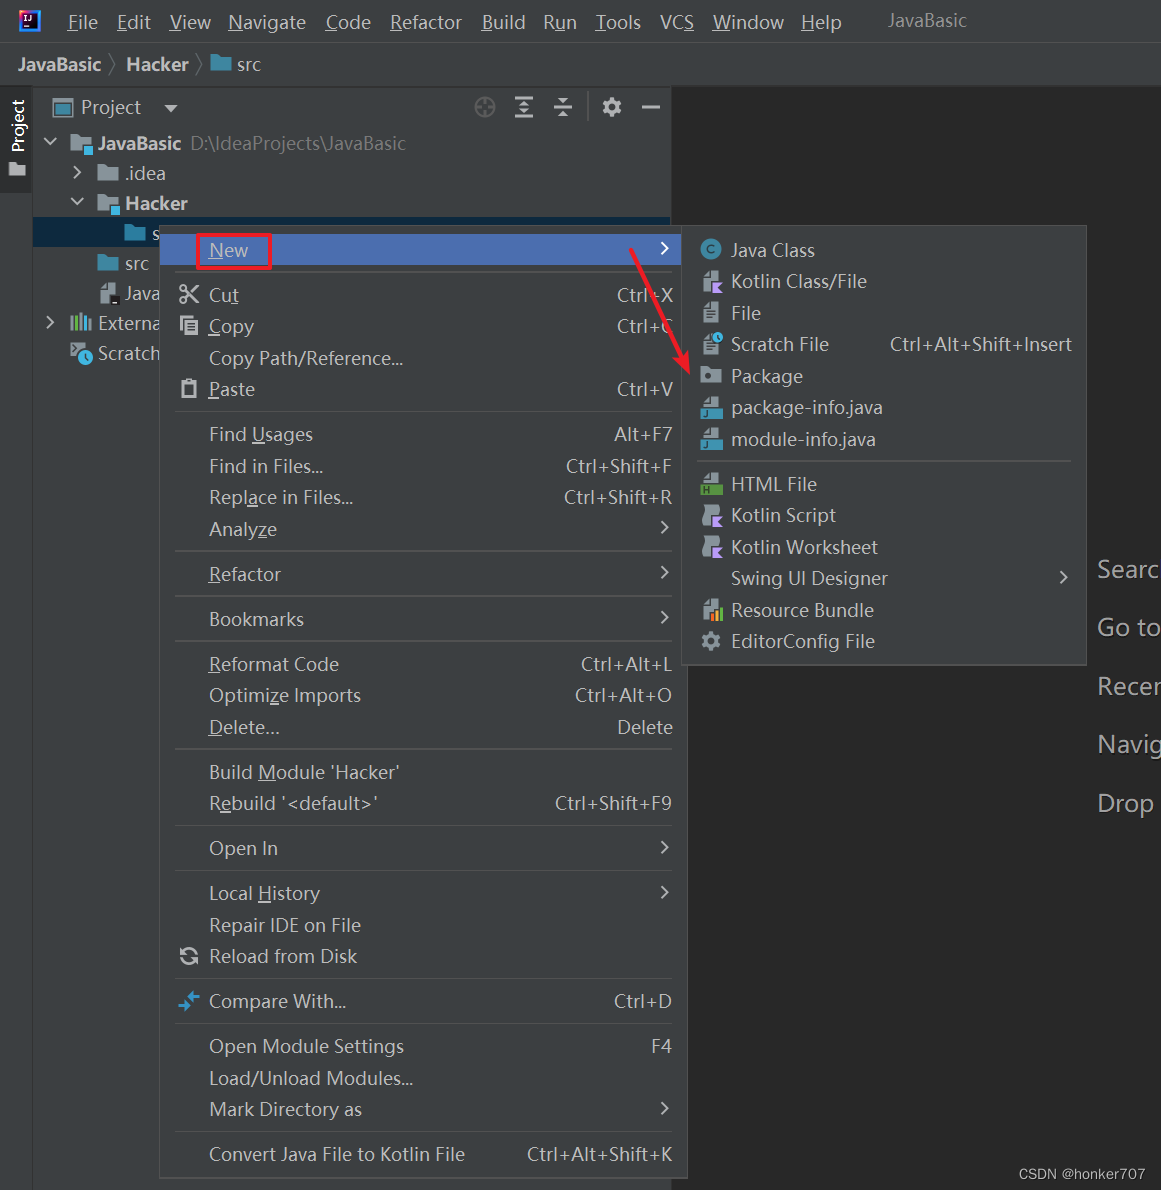
✅ Right-click the src folder under the module and create a package named "myapp."

✅ Right-click the package and create a class named "MyFirstApp."
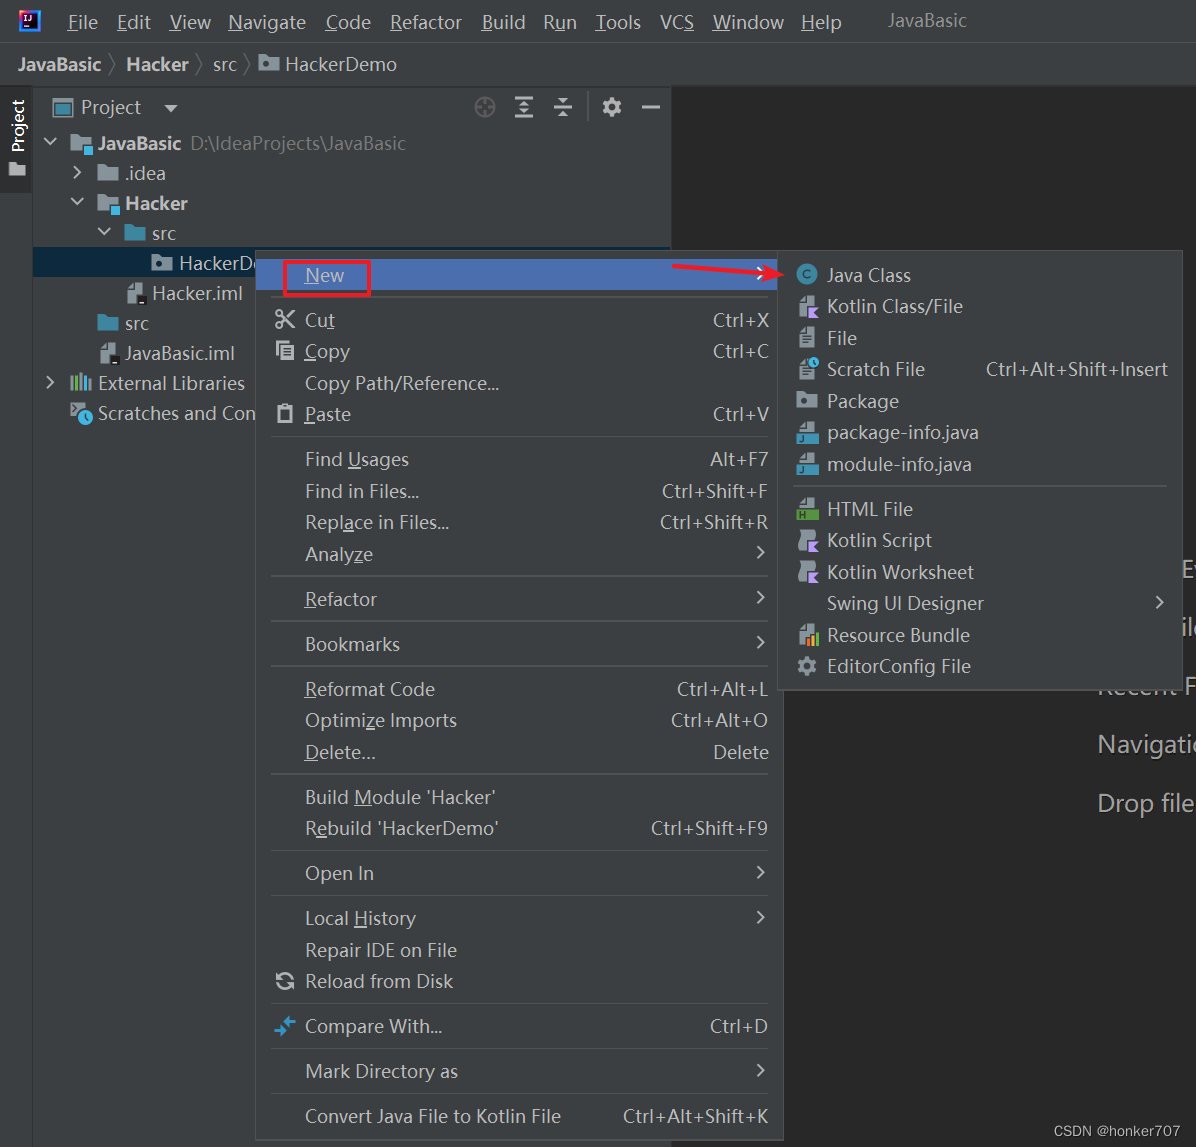
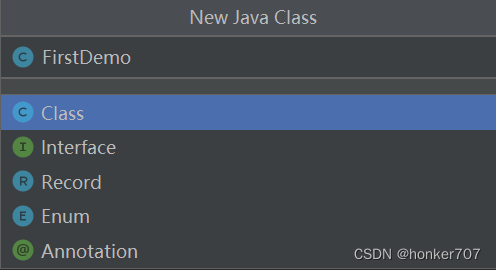
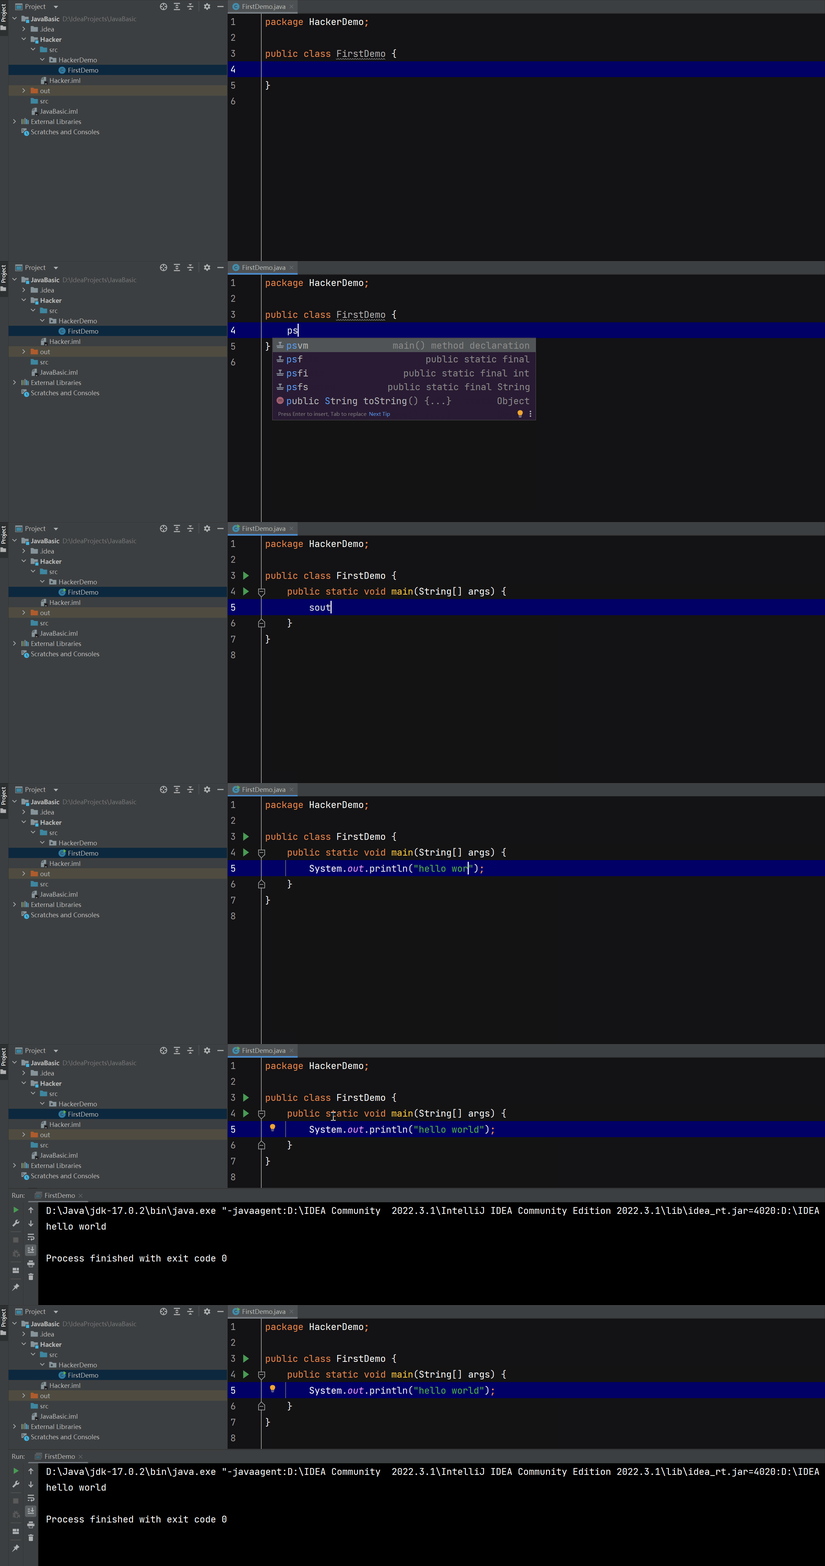
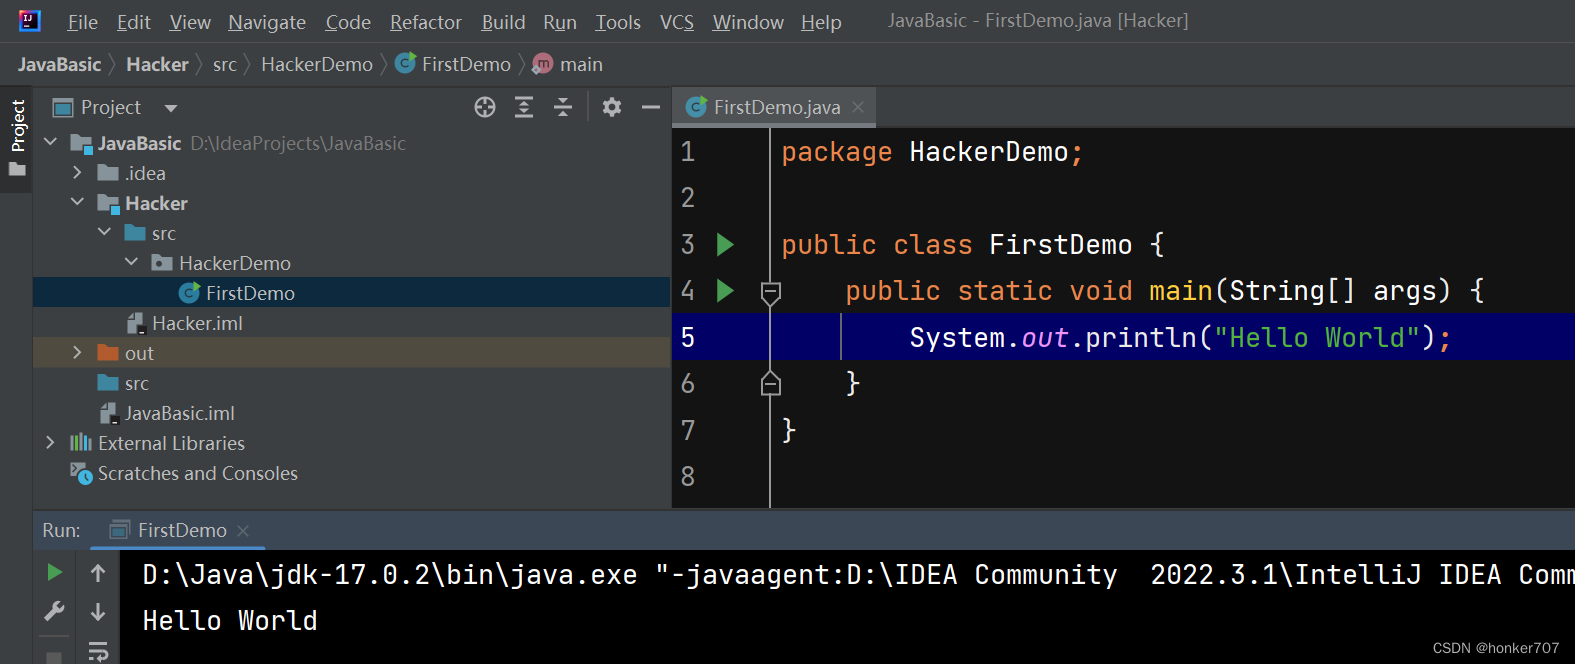
✅ Write the program to output "Hello World":
package myapp;

public class MyFirstApp {
   public static void main(String[] args) {
       System.out.println("Hello World");
   }
}
The output will be:
💬 Quick Tip:
😍 Type psvm to quickly generate the main method entry point:
public static void main(String[] args)
😍 Type sout to quickly generate the output statement:
System.out.println();