Deploying and Utilizing CephFS: A Distributed File System for Kubernetes and Linux
CephFS (Ceph File System) is a component of the Ceph storage solution, providing a distributed file system that enables file data access and management across multiple nodes. It serves as a shared file system applicable for storage in Kubernetes and as shared storage for Linux systems, requiirng the deployment of additional MDS (Metadata Server) components.
Deployment
CephFS utilizes two storage pools: one for storing file data and another for storing metadata.
- Data Pool: This pool stores the actual file content. You can configure parameters such as the replication factor for this pool.
- Metadata Pool: This pool stores file system metadata, including filenames and directory structures. Managing metadata is critical for file system performance, and storing it in a separate pool helps optimize this.
Creating the Data Storage Pool
ceph osd pool create cephfs_data 32 32
# The two numbers 32 represent the number of PGs (Placement Groups) and the PG replication factor, respectively.
# The PG replication factor must be greater than or equal to the number of PGs.
# According to official documentation, a higher number of PGs leads to more balanced data distribution.
Creating the Metadata Storage Pool
ceph osd pool create cephfs_metadata 32 32
Viewing Storage Pool Information
ceph osd pool ls detail

- size 3: Indicates that each object is replicated into 3 copies.
- min_size 2: Specifies that at least 2 copies must be online to meet data availability requirements.
- crush_rule 0: Refers to the CRUSH rule number used for data distribution across the storage cluster.
- object_hash rjenkins: Denotes the use of the rjenkins hash algorithm for objects.
- pg_num 32: Indicates the number of PGs in the storage pool.
- pgp_num 32: Represents the replication factor within each PG.
- autoscale_mode on: Enables automatic scaling of PG count based on cluster size.
- last_change 133: Timestamp of the last configuration change for the pool.
- flags hashpspool stripe_width 0: Includes flags and parameters such as CRUSH hash algorithm usage and stripe width.
- application cephfs: Specifies that the pool supports CephFS.
Creating the CephFS File System
ceph fs new cephfs cephfs_metadata cephfs_data
# Specifies the previously created metadata and data storage pools.
Deploying the MDS
ceph orch apply mds cephfs --placement="3 ceph01 ceph02 ceph03"
Verifying CephFS Status
ceph fs ls
ceph fs status cephfs
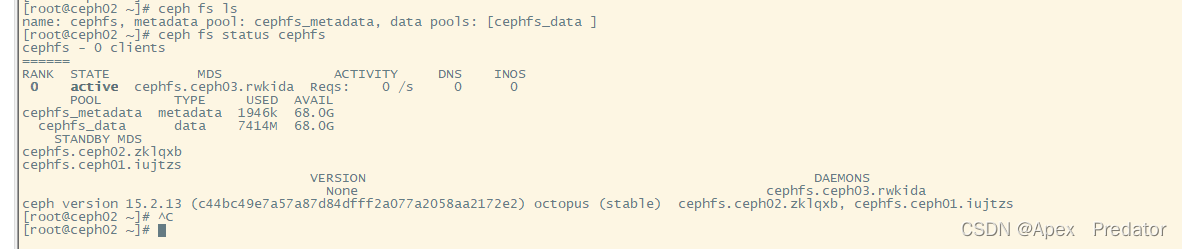
By default, Ceph supports only one active MDS, with others serving as standby nodes, so you will see only one MDS node in an active state.
At this point, the CephFS deployment is complete.
Using CephFS
Mounting on CentOS Systems
First, install the Ceph client.
Edit the YUM repository:
vi /etc/yum.repos.d/ceph.repo
Add the following content:
[Ceph]
name=Ceph
baseurl=https://mirrors.aliyun.com/ceph/rpm-15.2.9/el7/x86_64/
enabled=1
gpgcheck=0

[Ceph-noarch]
name=Ceph noarch packages
baseurl=https://mirrors.aliyun.com/ceph/rpm-15.2.9/el7/noarch/
enabled=1
gpgcheck=0
Install EPEL to resolve dependencies:
yum -y install epel-release
Install the Ceph client:
yum -y install ceph-common
On the Ceph management node (e.g., ceph01), generate a key:
ceph-authtool -p /etc/ceph/ceph.client.admin.keyring > ceph.key
Copy the key to the client's Ceph directory:
scp ceph.key root@10.1.60.118:/etc/ceph
# The client automatically creates the Ceph directory upon installation.
# In this example, host 10.1.60.118 is used as the client.
Mount the CephFS file system on the client:
# Create a mount directory
mkdir /mnt/cephfs
# Use the default admin user; other users can be created as needed.
mount -t ceph -o name=admin,secretfile=/etc/ceph/ceph.key 10.1.60.126:6789:/ /mnt/cephfs
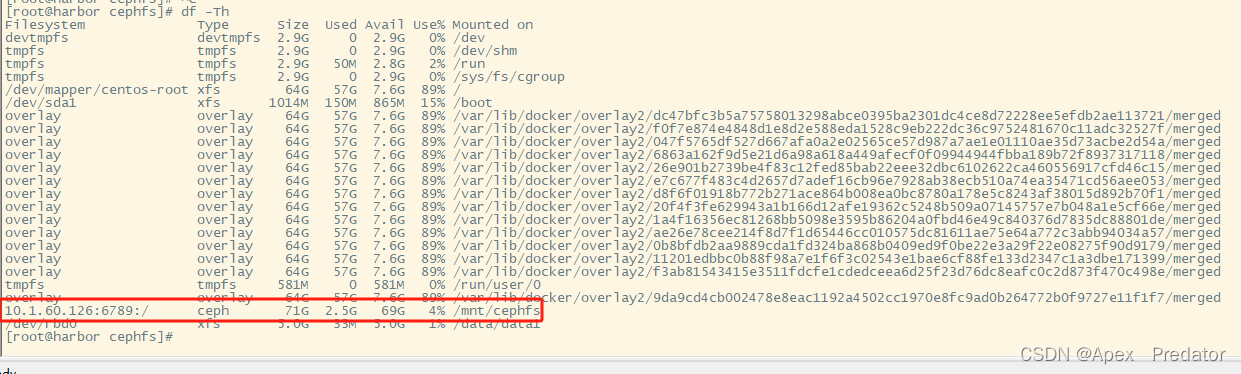
Check the mounted directory:
df -Th
Using CephFS as Storage in Kubernetes
Create a Ceph directory:
mkdir /opt/ceph && cd /opt/ceph
Copy the key from the Ceph management node to the Kubernetes node. All Kubernetes worker nodes must have ceph-common installed.
Encode the Ceph key in base64:
cat ceph.key | base64

Create a Secret YAML file:
apiVersion: v1
kind: Secret
metadata:
  name: ceph-secret
type: "kubernetes.io/rbd"  # Must use rbd type
data:
  key: "QVFCenRndG1wVzJPQXhBQW5oMVFyRHlvT05Oa2RZR25tSHpYUmc9PQo="  # Insert the base64-encoded key
Create a PersistentVolume (PV) YAML file:
apiVersion: v1
kind: PersistentVolume
metadata:
  name: ceph-pv
spec:
  capacity:
    storage: 20Gi
  accessModes:
    - ReadWriteOnce
  persistentVolumeReclaimPolicy: Retain
  storageClassName: ceph
  cephfs:
    monitors: ["10.1.60.126:6789", "10.1.60.127:6789", "10.1.60.128:6789"]  # List CephFS service nodes
    path: /  # Mount directory; other directories can be mounted directly if created
    user: admin
    secretRef:
      name: ceph-secret  # Use the Secret for authentication
Create a PersistentVolumeClaim (PVC) YAML file:
apiVersion: v1
kind: PersistentVolumeClaim
metadata:
  name: cephfs-pvc
  namespace: default
spec:
  accessModes: ["ReadWriteOnce"]
  storageClassName: ceph
  resources:
    requests:
      storage: 20Gi
Apply the YAML files to create the corresponding services:
kubectl apply -f secret.yaml
kubectl apply -f pv.yaml
kubectl apply -f pvc.yaml
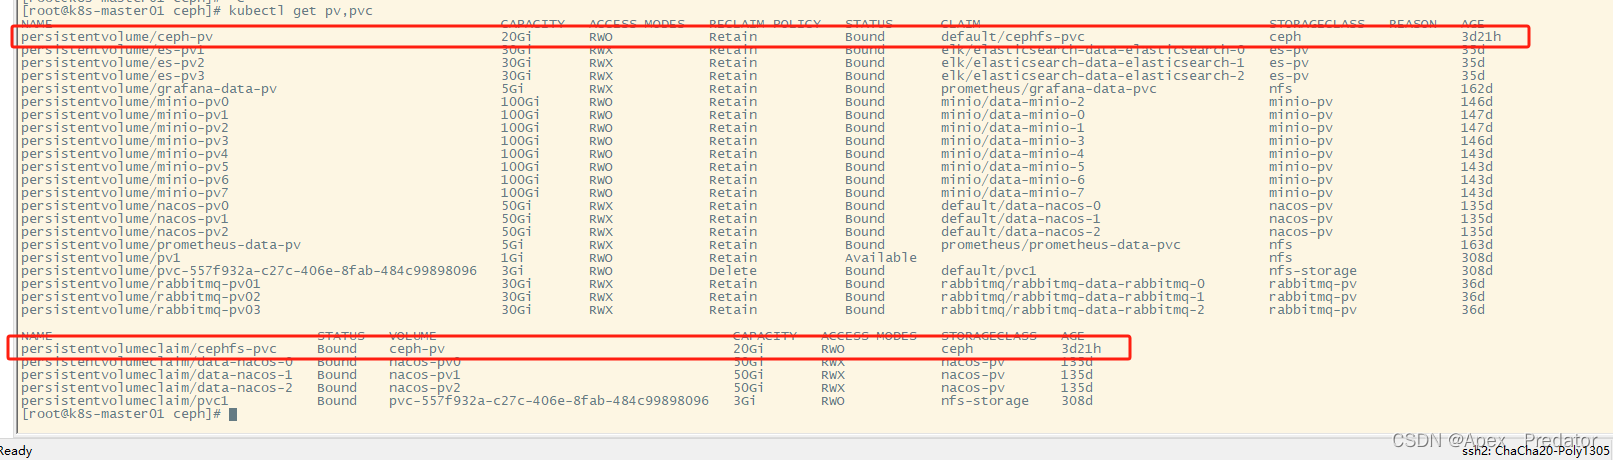
Verify that the PV and PVC are functioning correct:
kubectl get pv,pvc