Applying and Managing DevExpress WinForms Skins and Themes
This topic explains how to apply DevExpress themes/skins to applications, allow users to switch between themes at runtime, customize existing skins, or create new ones.
DevExpress WinForms subscriptions include numerous essential controls such as buttons, checkboxes, forms, message boxes, and dialogs. A key reason for implementing these controls is to support our theming system. With DevExpress, you gain access to a wide variety of visual styles and a comprehensive control library that ensures visual consistency across your entire application.
To view available themes/skins, open any demo application.
How too Apply a Skin
Design Time
Open the Project Settings page and select the desired WinForms theme. This page is not available in .NET Core prjoects. Place the DefaultLookAndFeel component on a form and use its smart tag menu, or specify the desired skin in code.
Runtime (In Code)
Call the UserLookAndFeel.SetSkinStyle method.
using DevExpress.LookAndFeel;

// ...
UserLookAndFeel.Default.SetSkinStyle(SkinStyle.WXI);
How to Enable Bonus or Custom Skins
DevExpress skins are primarily divided into two categories: modern skins recommended by DevExpress, and outdated/thematic skins stored in separate libraries/packages.
- Modern skins are available immediately when you create a project using the template library or place any control on a form. If you start with a blank project, you need to add the DevExpress.Utils library manually (or install the DevExpress.Utils NuGet package). For blank .NET Core (.NET 5+) projects, install the DevExpress.Win.Design package.
- Outdated and thematic skins are stored in the DevExpress.BonusSkins library/NuGet package. These skins must be registered before you can apply them. To register bonus skins, check the corresponding setting on the Project Settings Page, or call the
Registermethod on application startup:
namespace WindowsFormsApplication1 {
    static class Program {
        [STAThread]
        static void Main() {
            DevExpress.UserSkins.BonusSkins.Register();

            Application.EnableVisualStyles();
            Application.SetCompatibleTextRenderingDefault(false);
            Application.Run(new Form1());
        }
    }
}
After bonuss skin are registered, you can apply them in the same manner you apply standard skins.
using DevExpress.LookAndFeel;

UserLookAndFeel.Default.SetSkinStyle(SkinStyle.Pumpkin);
How to Let Users Select Skins at Runtime
DevExpress WinForms subscriptions include several ready-to-use bar items that allow your users to switch between skins and skin palettes. You can add these items to the toolbars, ribbons, and title bars of Toolbar Forms and Fluent Design Forms.
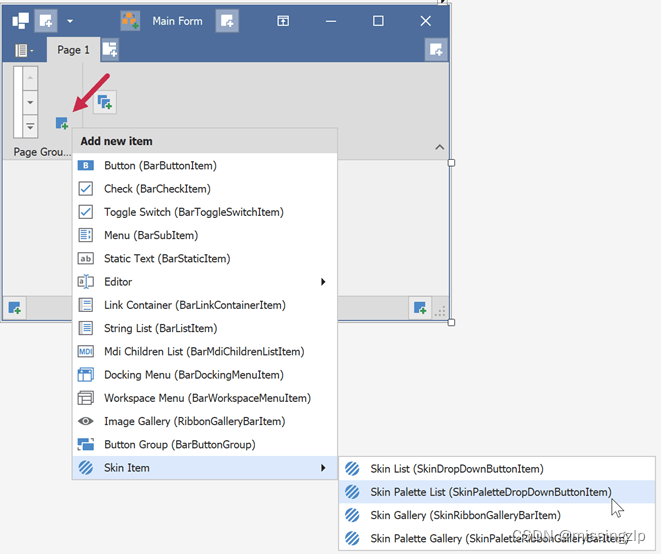
The following code adds a skin gallery selector to the ribbonPageGroup2 group.
using DevExpress.XtraBars;
// ...
SkinRibbonGalleryBarItem skinGallery = new SkinRibbonGalleryBarItem();
ribbonPageGroup2.ItemLinks.Add(skinGallery);
Note: If you create a skin selector as a dropdown button item in code, you need to call the InitDropDownSkinGallery method to initialize the dropdown list of this selector.
using DevExpress.XtraBars;
using DevExpress.XtraBars.Helpers;
// Add the selector next to the standard "Close", "Maximize", and "Minimize"
// buttons of the Toolbar Form
SkinDropDownButtonItem skinSelector = new SkinDropDownButtonItem();
SkinHelper.InitDropDownSkinGallery(skinSelector);
skinSelector.Alignment = BarItemLinkAlignment.Right;
this.toolbarFormControl1.TitleItemLinks.Add(skinSelector);
To rename and/or change the icons of items in these standard skin selectors, handle the SkinHelper.CreateGalleryItem event.
using DevExpress.XtraBars;
using DevExpress.XtraBars.Helpers;

SkinHelper.CreateGalleryItem += (s, e) => {
    if (e.ItemName.Equals("DevExpress Style")) {
        e.GalleryItem.Image = e.UseLargeIcons ? MyCustomLargeIcon : MyCustomSmallIcon;
        e.GalleryItem.HoverImage = MyCustomLargeIcon;
        e.GalleryItem.Caption = "Moonlight";
    }
};
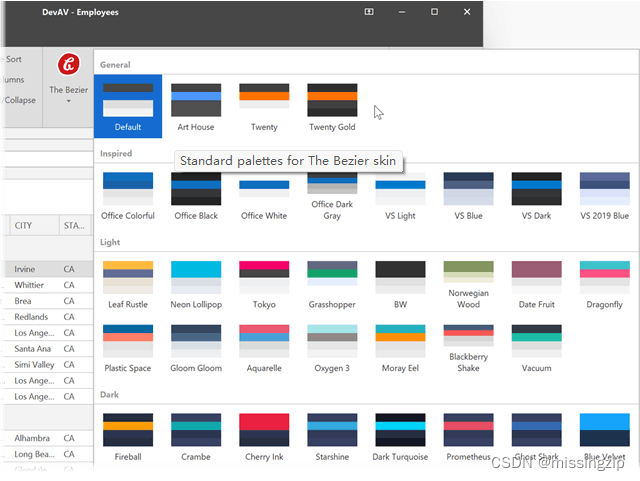
Skin Palettes
DevExpress WinForms skins can draw raster or vector images on UI elements. Raster skins have only one default appearance, while each vector skin comes with a set of palettes (variants). Users can select a palette to modify the color scheme of the current skin. The image below shows some of the palettes included with the "Bezier" vector skin.
You can apply a palette in the same manner as specifying a skin: open the Project Settings Page or call the SetSkinStyle(SkinSvgPalette) overload.
using DevExpress.LookAndFeel;
// ...
UserLookAndFeel.Default.SetSkinStyle(SkinSvgPalette.Bezier.Tokyo);
Default App Mode (Light/Dark)
Use the WindowsFormsSettings.TrackWindowsAppMode setting to specify that the application tracks the "Default app mode" setting in the Windows operating system and displays only light or dark palettes in the skin gallery.
The following example demonstrates how to enable the TrackWindowsAppMode setting:
static void Main() {
    Application.EnableVisualStyles();
    Application.SetCompatibleTextRenderingDefault(false);
    WindowsFormsSettings.TrackWindowsAppMode = DevExpress.Utils.DefaultBoolean.True;
    Application.Run(new Form1());
}
Highlight Individual Controls
You can set custom background, border, and foreground colors for individual DevExpress controls (e.g., SimpleButtons). To do this, access settings from the control's Appearance group. It is recommended to use DX Colors instead of system colors: these colors are retrieved from the skin and are automatically updated when a user changes the skin at runtime.
// Use DXSkinColors.FillColors for background colors
simpleButton1.Appearance.BackColor = DXSkinColors.FillColors.Danger;
// Use DXSkinColors.ForeColors for text colors
simpleButton1.Appearance.ForeColor = DXSkinColors.ForeColors.Warning;
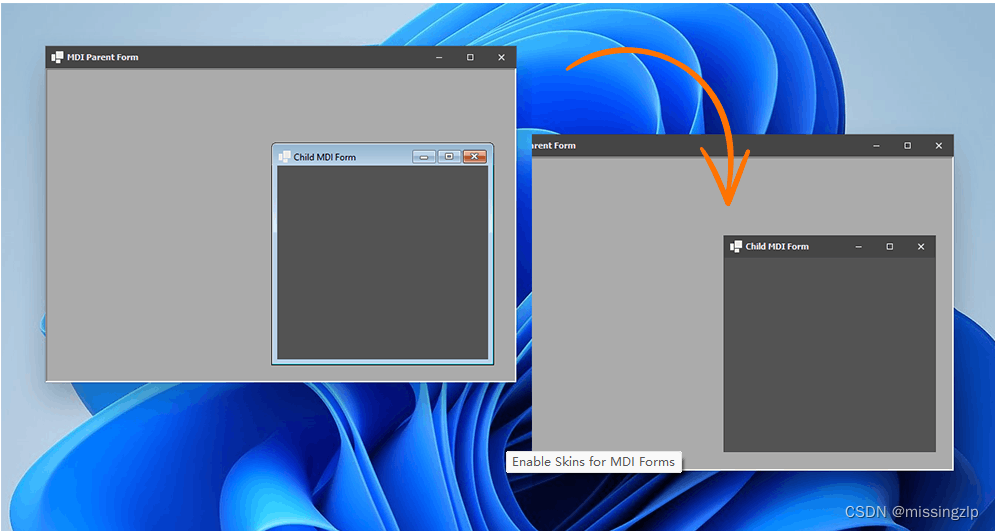
Enable Skins for MDI Forms
Call the EnableMdiFormSkins() method in the Program.Main() entry point.
using System;
using System.Windows.Forms;
using DevExpress.XtraEditors;

namespace DXApplication14 {
    internal static class Program {
        [STAThread]
        static void Main() {
            Application.EnableVisualStyles();
            Application.SetCompatibleTextRenderingDefault(false);
            WindowsFormsSettings.EnableMdiFormSkins();
            Application.Run(new Form1());
        }
    }
}
Examples and Best Practices
- How to get the names of the current active skin and palette
Read the values of the
ActiveSkinNameandActiveSvgPaletteNameproperties.
var skinName = UserLookAndFeel.Default.ActiveSkinName;
var paletteName = UserLookAndFeel.Default.ActiveSvgPaletteName;
- How to identify when the skin or palette is changed at runtime
Handle the static
UserLookAndFeel.StyleChangedevent. This event is raised every time a user applies a different skin or skin palette.
UserLookAndFeel.Default.StyleChanged += (s, e) => {
    // TODO: Handle the change
};
- How to reapply the last active skin when the application restarts
The Windows Forms application settings feature allows you to create, store, and maintain custom application and user preferences on a client computer. You can use this feature to save and restore the active skin and palette when the application restarts.
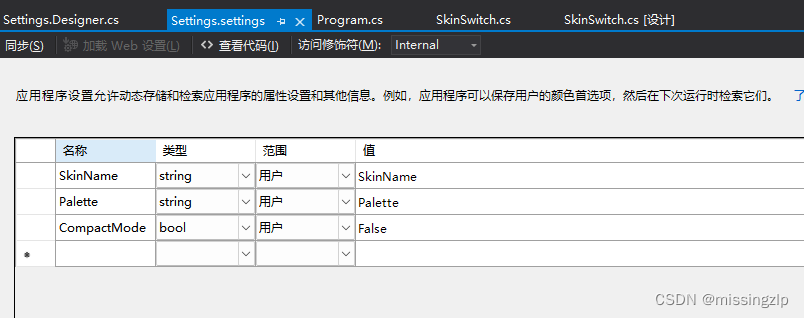
Double-click the
Settings.Settingsfile in the Visual Studio Solution Explorer, then create two entries of typeString. Set the scope of both antries to "User". When the application is about to close, save the values of theUserLookAndFeel.Default.SkinNameandUserLookAndFeel.Default.ActiveSvgPaletteNameproperties to the application settings. When the application starts, read these saved values and pass them to theUserLookAndFeel.SetSkinStylemethod as parameters.
private void SkinSwitch_FormClosed(object sender, FormClosedEventArgs e)
{
    var settings = Properties.Settings.Default;
    settings.SkinName = UserLookAndFeel.Default.SkinName;
    settings.Palette = UserLookAndFeel.Default.ActiveSvgPaletteName;
    settings.CompactMode = UserLookAndFeel.Default.CompactUIModeForced;
    settings.Save();
}
protected override void OnShown(EventArgs e) {
    base.OnShown(e);
    var settings = Properties.Settings.Default;
    if (!string.IsNullOrEmpty(settings.SkinName)) {
        if (settings.CompactMode)
            UserLookAndFeel.ForceCompactUIMode(true, false);
        if (!string.IsNullOrEmpty(settings.Palette))
            UserLookAndFeel.Default.SetSkinStyle(settings.SkinName, settings.Palette);
        else UserLookAndFeel.Default.SetSkinStyle(settings.SkinName, "DefaultSkinPalette");
    }
}
